Thursday, June 30, 2011

4th of July Inspiration!

After looking around the last few days in blog land, I wanted to share a few of the fabulous 4th of July projects and recipes I've come across. I've decided more then ever that I love the Americana look and really want to build on my decor in that area, during the summer.


This 4th of July Patriotic Berry Trifle at Six Sisters Stuff looks absolutely mouth watering. I love Trifle! If I get to the Berry Farm tomorrow, I might just make this on Monday.


The Lady Behind the Curtain has done fabulous chocolate work with these fireworks on her cupcakes. They look BRILLIANTLY BRIGHT!


This  Patriotic Paper Pinwheel at The Answer is Chocolate is a very simple, yet stunning decoration for the 4th.


How fun are these Patriotic Pinwheels in the coke bottles? Wayward Girls Craft came up with this fun idea.


I love this Patriotic Wreath at The Scrap Shoppe


Thrive has made some fun DIY Flat T-Shirts, using old T-shirts you may already have on hand.


Joy is at Home has made this headband with fleece and I think I've got to make one this weekend for Ciara to wear on the 4th. Super cute and super easy.


If you like to add a little silliness to your party on Monday, here are some Conversation Starters that the Happy Home Fairy has put together so you can print them out. 


The possibilities are limitless, look around, see what you can do to show your patriotism.

Christmas in July Ornament Swap

Our host for this year has received all the ornaments from our various swap partners and they will soon be on their way. Here is a picture of all the fun boxes! I'm so excited now.... and soon I'll be able to unveil the ornaments I made for this years swap. Being a part of Magical Holiday Home is the best.

Wednesday, June 29, 2011

This is why I love the hunt...Ideas like this!!

When you see this....


Do you think of this????  


Projects like this are exactly why I enjoy the hunt of turning the ordinary, into extraordinary. At Mod Vintage Life she has turned these trashed silver trays, into a spice rack. They can also be used in a bedroom or bathroom for perfume bottles and who know what else others can come up with. If you want a step, but step tutorial, check our her website. She's done a great job!  

I'm excited...can you tell?

Saturday, June 25, 2011

Happy Rudy Day...On this hot blistering day!


As it passes the 90 mark here in Denver, I decided to watch a Christmas movie. I love keeping them on the DVR, because not only do I get the movie, but I get visions of snow and sweats and winter chill. Things that I wish I was enjoying at the moment. 

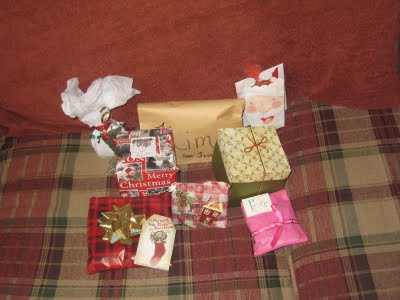
No fancy dinner today and no crafting plans, instead I hit the thrift stores in search of some house decor and odd ball items to redo and make spectacular for future gifts. It was my visit to a thrift store on a Saturday, during one of their 50% off "EVERYTHING" sales. It wasn't too bad and I will say they had a ton more out to look at then normal, but I would not want to be in the market for clothes on one of these days. It was a bit crazy in that section. I'll post some pictures on Monday of my finds. 

But now, how about a yummy recipe from Annies-Eats. These S'mores Cupcakes look super yummy! 


S’mores Cupcakes
Printer-Friendly Version
Yield: 24 cupcakes
Ingredients:

For the graham cracker crust:
1½ cups graham cracker crumbs
¼ cup sugar
5 1/3 tbsp. unsalted butter, melted
8 oz. bittersweet chocolate, finely chopped
For the cake:
2 cups plus 2 tbsp. sugar
1¾ cups all-purpose flour
¾ cup plus 1 tbsp. cocoa powder
1½ tsp. baking powder
1½ tsp. baking soda
1 tsp. salt
2 large eggs
1 cup whole milk
½ cup vegetable oil
2 tsp. vanilla extract
1 cup boiling water
For the frosting:
8 large egg whites, at room temperature
2 cups sugar
½ tsp. cream of tartar
2 tsp. vanilla extract

Directions:
Preheat the oven to 350° F.  Line two cupcake pans with paper liners.  In a small mixing bowl, combine the graham cracker crumbs, sugar and melted butter; mix well with a fork.  Drop about 1 tablespoon of the graham cracker mixture in the bottom of each cupcake liner and press down to line the bottom. (Note: I found the bottom of my squeeze bottle to be the perfect size to do this job neatly and quickly.) Sprinkle a small amount of the chopped chocolate on top of the graham cracker crusts.  Bake for 5 minutes.  Remove from the oven, and maintain the oven temperature.

To make the cake batter, sift together the sugar, flour, cocoa powder, baking powder, baking soda and salt in the bowl of an electric mixer fitted with the paddle attachment; mix on low speed just to combine.  In a mixing bowl, combine the eggs, milk, vegetable oil and vanilla extract; whisk together.  Add to the dry ingredients and mix on low speed for 30 seconds.  Scrape down the sides of the bowl, then beat on medium speed for 2 minutes.  Add the boiling water and stir just to combine (batter will be thin).

Divide the batter evenly between the prepared cupcake liners, filling each about ¾ of the way full.  Return the pans to the oven and bake about 18-20 minutes, until a toothpick inserted in the center comes out clean, rotating the pans halfway through baking.  Allow to cool in the pans 5-10 minutes, then remove and transfer to a wire rack to cool completely.

To make the frosting, combine the egg whites, sugar and cream of tartar in the top of a double boiler. (Note: I just set my clean, dry mixer bowl over simmering water, to avoid dirtying two bowls.) Heat the mixture, whisking frequently, until it reaches 160° F with an instant-read thermometer.  Transfer the mixture to the bowl of an electric mixer fitted with the whisk attachment.  Whisk starting at low speed and gradually increasing to medium-high speed until stiff, glossy peaks form.  Mix in the vanilla until combined.  Frost cooled cupcakes as desired.  Brown with a kitchen torch and garnish with chocolate and graham cracker segments (optional).


Skip To The Lue S'mores Cookies 

Skip To The Lue Root Beer Floats on a Stick


Friday, June 24, 2011

Costco...Art Gallery

Did you know that Costco can print a large variety of art...IN CANVAS?  Their catalog is growing and I just got an email showing their 4th of July collection. Their are some great pieces in there. If you're not into the Red, White and Blue, check out their entire collection for old and new pieces of art.  It's a great, inexpensive option to decorate your walls.    


Monday, June 20, 2011

Things That Inspired Me Today!!

I haven't looked at many of the blogs I belong to in the past week, but today I took a few minutes and as usual, there are so many great projects being done. Always makes me say...Why didn't I think of that. Some of these women are incredible.

Curb Appeal at Remodelaholic hit home with the projects I did last week. Little changes and upgrades can make a huge difference on how your home appears to those who enter! The entrance into your home is the first message sent to those visiting.


You won't believe what this sideboard cabinet looked like before this redo. Serendipity Chic Design does amazing work.


This dresser at Charming Decor is super chic, yet subtle. I might use some of the ideas for Ciara's dresser redo's. 


Now these Smore's cookies at Skip to the Lue just look Super Yummy...


This next idea at Mod Vintage Life is my favorite. I'm already on the hunt for a chandelier, but this just adds to my want list. This planter idea is fabulous. I'd have to have a tree to hang it from, but if I did I'd make one of these in a second. Maybe I'll have to make one for someone else.


Lastly, I love this picture frame arrangement. It's super simple, but yet has a great visual impact.

More Porch Goodies!


Yes, I know...Ducks?? When I seen this old wooden sign for $1.00 at a garage sale, I knew I had to have it. I'd been wanting to make a sign to hang above my door for sometime and this was the perfect base to start with. It took lots of sanding to wear the outlines of those ducks down, but once I did, I layered it generously with black primer, then black paint. I finished by painting some white over that (mostly around the edges) and then sanded it down once again to get a worn look. I had been pondering what verse I wanted to cut out on my cricut, but when I ran across a whole stack of discounted vinyl quotes at Joanne's I just chose one of those for $5.00 and called it good. So here it is and currently it hangs above the outside of my front door.


After I finished the furniture, I had a bit of that spray paint leftover, so I figured why not clean up my mailbox. I'd been talking to a friend about painting something with detail on it, but I didn't want to wait. So once again, I washed it, used black primer and painted it with the same Krylon paint I used for the patio furniture. I used some super duper heavy duty glue and attached this shamrock I had in my house. It's a bit large, but I like the glimmer it gives me when I pull up to the house.


My Sad Mailbox Before:


And After: 

Sunday, June 19, 2011

$50.00 Vinyl Giveaway at....I Heart Nap Time!


One of my favorite blogs has this fabulous....

Vinyl Crafts $50 giveaway

Check Out

 For Details 

Some of my favorites are...


Saturday, June 18, 2011

Patio Furniture Upgrade!

When I bought this furniture several years ago. As the years passed, it faded to this horrible brown color. It's not even a real brown...more of a gray brown, with some black mixed in. When I was searching out paint for some other projects, I came across paint specifically for plastic. The seats look wicker, but they are actually more of a plastic.


After a few cans of Krylon Fusion for Plastic in Black Textured Shimmer


 And some new seat cushions from Home Depot
   

One Basset Hound repainted from Hobby Lobby

And this is what you get......


And that life size dog above is not a repainted statue, nor for sale.....That's Hoover enjoying the view! 

Be back tomorrow with some smaller projects I did to spruce up the front porch.

Friday, June 17, 2011

Temple Block - "I'm going there someday"

Ciara just got home from Girls Camp and I was super excited to see one of her projects. When she pulled out this temple block, I was instantly tickled with that crafters excitement we get once in awhile.  


I've had the link to this project marked for sometime now and had all intentions of doing them with my older Activity Day girls until I was released recently. Now that I've seen the actual piece, I will definitely make some for a few of the younger girls in our ward and for my niece.


To see a complete list of the temples she has available for printing, check out the "Lil' Luna Blog"

The San Diego Temple is my favorite in photos. 


But to keep it more personal, I think I'll make mine with the Denver Temple. 


Not LDS, don't hesitate to convert any "Vintage" 
looking, scanned photo into this project.

Thursday, June 16, 2011

Mini Vases and New Flowers

I'm keeping today's post quick, but can't wait till I get my memory card back tomorrow so I can show you all the nice things I've made for the front porch. 

I'd been waiting for these Black flowers to be restocked at Michael's since the beginning of Spring. They were in and they were OUT. I walked in yesterday and they had them for .99 cents a piece. Great deal!  So late last night, I decided to find these three vases I knew I had stashed somewhere and repaint them.


Start with a rainbow of colors: 


Add a little primer and paint:


And this is what you get: